Electronics
Power Distribution Modules
There are two different types of power distribution modules, or the main thing that distributes the software. There is the REV one (REV Expansion Hub), and the modern robotics one (Core Power Distribution Module). The REV one have the wiring ports of motors, sensors, servos, etc. all one the same board, also it has 4 motor ports. The modern robtics one distributes it to many different other modules. The other modules includes motor controller, servo controller, device interface, and the legacy module. The motor controller have 2 motor ports, the servo controller and device interface have a lot.
REV Expansion Hub:

Core Power Distribution Module:
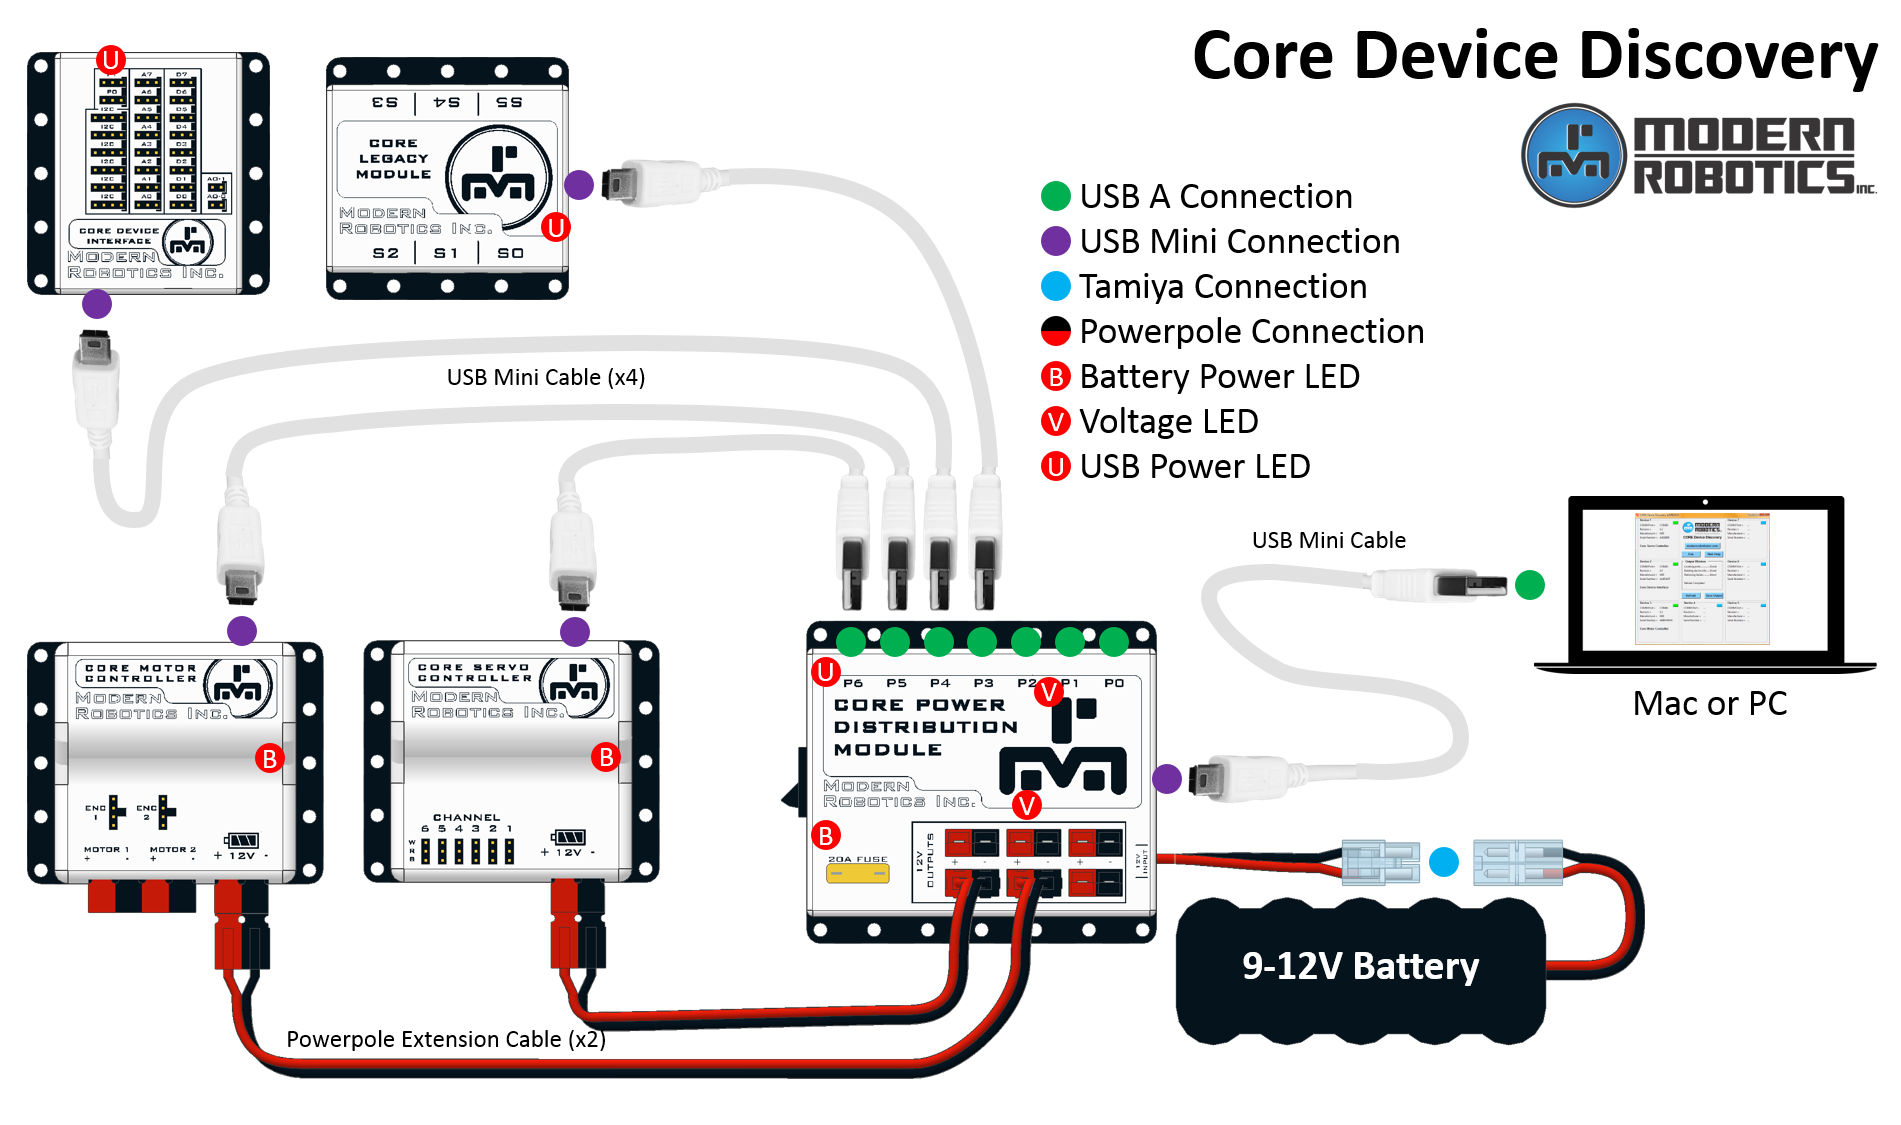
Learn about basic Core Power Distribution Module Wiring: Wiring Modern Robotics Power Distribution Module
General Wiring Tips
- If something is not working, make sure when you configure the robot, you set the correct ports to the correct things.
- Make sure the wires are plugged in correctly and not loose, correctly means the color to itself. As in red to red, black to black, etc. Also, white sometimes goes to yellow.
- Label your wires, label both ends the same thing, preferably what you named it in the program.
If REV Expansion Hub does not have enough ports for your robot, you can connect both of them together!
How to connect them: Connecting REV Hubs
Servo Info
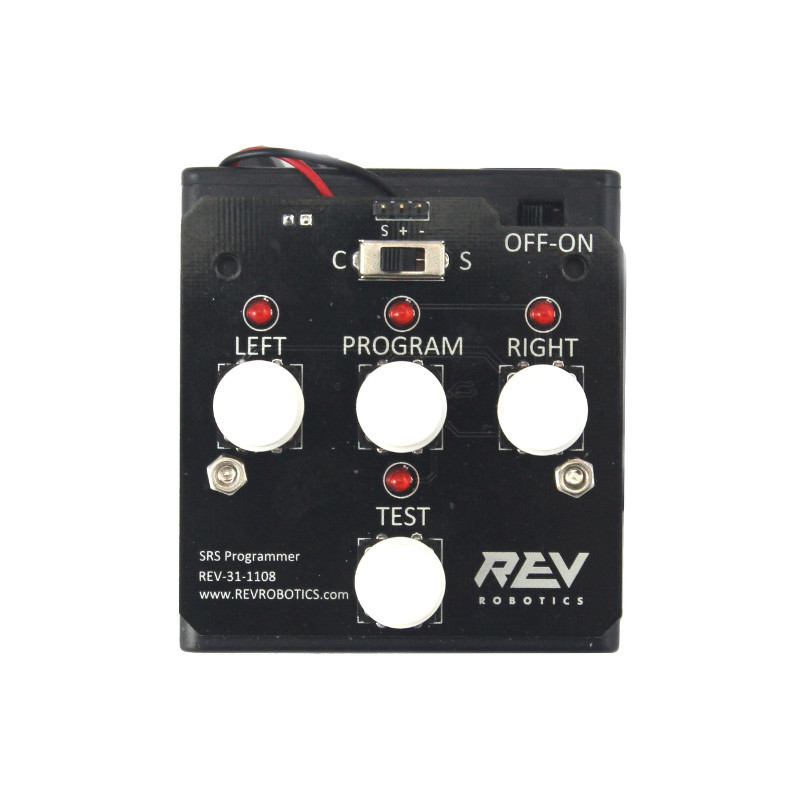
SRS Programmer The SRS programmer is a device that can limit the movement of a Smart Robot Servo.
Some of its features are:
- 3 programming modes
- Continuous rotation
- Angular limits
- Reset to factory defaults
- Test modes
- Automatic sweep: Press the test button once
- Manual position/direction: Press the test button twice
- Return to default: Press the test button three times
There is a switch at the top, it is either c with stands for continuous, s stands for servo, or the range right now.
To change the range follow these steps:
- Connect the servo to the programmer
- Turn the programmer on and put it on servo mode, s on the top switch
- Manually rotate the servo to the wanted most left position, then press and release the left button, the left LED will illuminate if the poisition is valid
- Repeat step 3 for the desired right position
- After both LED lights of right and left have both illuminated once, press and release the program button. If the program LED blinks and then stays on, it indicates you successfully changed the servo range.
For more information on the SRS Programmer, click here
REV Hub Interface Software
REV Hub Interface is an app that you can get. It allows you to move things connected to the REV Hub, such as rotate motor/servo. For example, if you want to calibrate a servo or test the numbers you need for your program, your setup should include a battery, a expansion hub, and your servo with whatever attachment. Something like this: 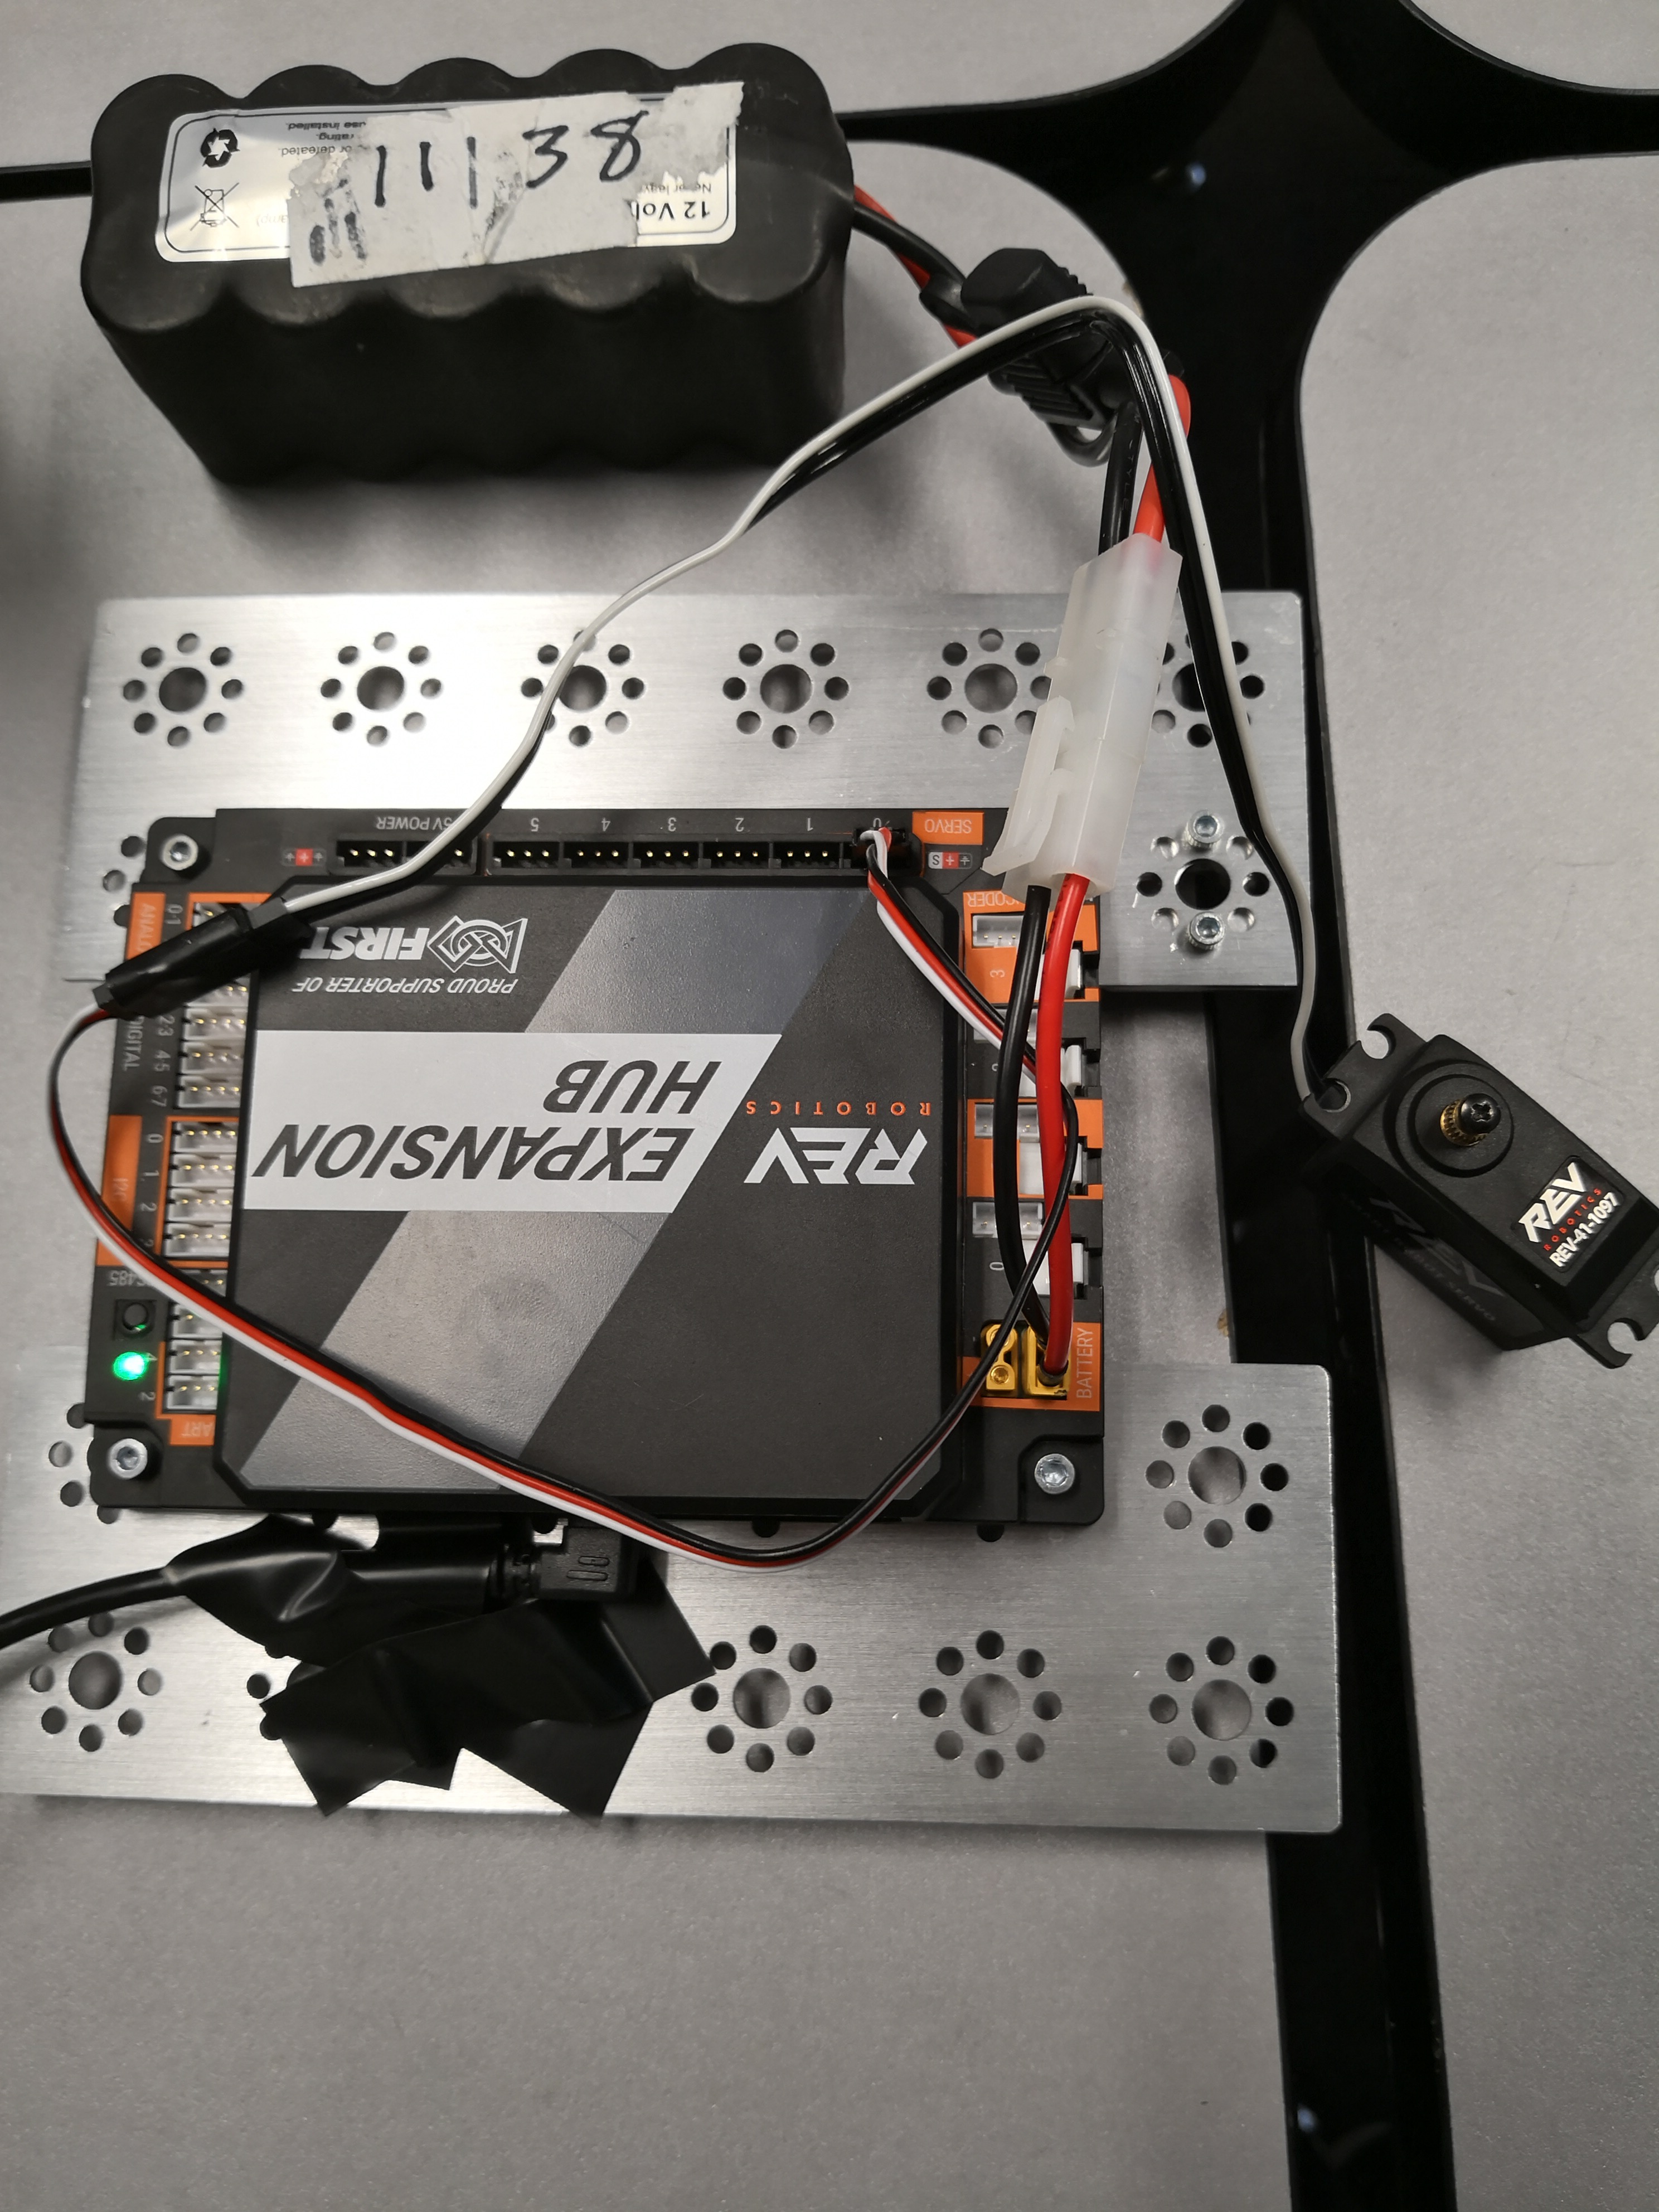 Plug the USB wire into your computer, then open your REV Hub Interface. If you don’t have it and want to download it, click here
After you open REV Hub Interface, click the connect button at the top.
Plug the USB wire into your computer, then open your REV Hub Interface. If you don’t have it and want to download it, click here
After you open REV Hub Interface, click the connect button at the top.
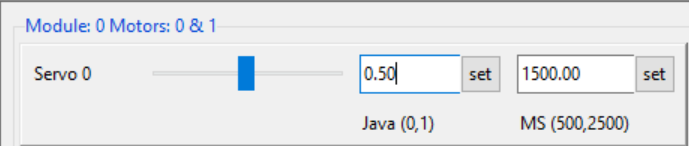
 After clicking the connect button, click the section where you want to do stuff in, in my case, the servo motor section. The servo motor section have a slide thing to change the orientation of the servo, so that you could know the numbers for the servo rotation. You can push the slide till the number is perfect because that number lets your servo claw hold something. There is a java number, which is the number used in code and a MS number.
It should look something like this:
After clicking the connect button, click the section where you want to do stuff in, in my case, the servo motor section. The servo motor section have a slide thing to change the orientation of the servo, so that you could know the numbers for the servo rotation. You can push the slide till the number is perfect because that number lets your servo claw hold something. There is a java number, which is the number used in code and a MS number.
It should look something like this: